
A stamped concrete floor can look impressive when the work is complete, but the finished pattern is only one part of a successful installation. The slab needs a suitable base, the right concrete specification, planned joints and drainage, careful timing, appropriate materials and proper curing. Mistakes in the early stages can affect the appearance and performance long after the stamps have been removed.
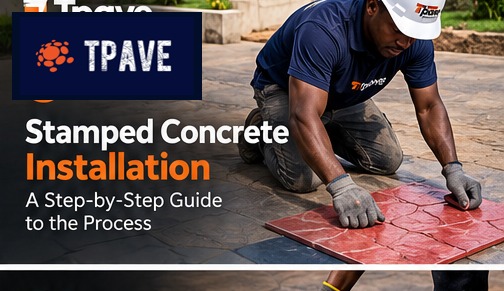
This guide explains the main stages of stamped concrete installation in Nigeria. It is intended to help property owners understand the process and ask informed questions. Concrete design and site-specific construction should be handled by experienced professionals who can assess the actual ground, loads and conditions.
1. Inspect and measure the site
The installer should first measure the area and confirm how it will be used. A pedestrian path, driveway and commercial access area do not necessarily require the same slab design. The team should review access for concrete delivery, the ground condition, existing drains, utility routes, levels and connections to buildings or other surfaces.
Confirm the proposed pattern and borders before work begins. A layout plan helps the crew estimate materials and labour and reduces the chance of awkward pattern alignment at edges or around obstacles.
2. Prepare the subgrade and base
Unstable topsoil, unsuitable fill and poorly compacted ground can contribute to settlement and cracking. Site preparation should be based on the ground condition and the project’s requirements. The contractor should explain how the area will be excavated, levelled and compacted, and whether a suitable base layer is required.
Do not assume a standard excavation depth suits every site. The required depth depends on existing levels, soil, drainage, slab design and intended loads. If the ground is weak or the project is substantial, specialist assessment may be necessary.
3. Plan drainage, reinforcement and joints
Water management should be considered before concrete is poured. The surface should direct water where intended and avoid unwanted pooling against buildings. Any underground plumbing, electrical conduits or other services that must pass beneath the slab should be coordinated before casting.
Reinforcement and control-joint requirements depend on the slab design and conditions. Joints help manage where shrinkage-related cracking is more likely to occur, but they do not make concrete immune to cracking. Ask the contractor how joints will be positioned and how the design accommodates edges, corners and changes in geometry.
4. Set formwork and confirm the concrete specification
Formwork defines the slab’s boundaries and should be secure enough to maintain the intended shape during placement. The concrete specification should suit the use and site conditions. Avoid choosing a mix solely because it is the cheapest or because a generic recipe appears online. The contractor should explain the planned mix, delivery arrangements, placement sequence and how the crew will keep the work moving.
The stamping operation is time-sensitive. The area size, weather, crew numbers and delivery schedule should be coordinated so the concrete can be finished and imprinted within the appropriate working window.
5. Finish the surface and apply colour where specified
After placing and levelling the concrete, the crew finishes the surface using suitable tools and waits for the appropriate stage to apply the selected colour system. A dry-shake colour hardener, where specified, must be applied and worked into the surface according to the manufacturer’s instructions. Coverage, timing and finishing influence the final colour and surface quality.
Do not copy application quantities from another project without checking the product instructions. Conditions, concrete characteristics and desired finish can change the amount required.
6. Apply release agent and stamp the concrete
A suitable release agent helps prevent stamping mats from sticking to the fresh concrete and may contribute colour contrast. The team checks that the concrete is ready: too soft and it may deform; too hard and the stamp may not create a clear impression. Timing is a key reason to use a crew familiar with the process.
The first row must be aligned carefully because it guides the following rows. Stamps are arranged in the correct sequence, pressed into the surface and moved in a planned pattern. Edges and tight spaces may need different tools or detailed work. The crew should check alignment and texture throughout rather than waiting until the whole slab is complete.
7. Cure, clean and seal
The concrete needs appropriate curing and protection. The exact procedure depends on the concrete, weather and products used. Cleaning should take place at the appropriate stage, particularly where a release agent has been used. A compatible sealer can help with surface protection and colour appearance, but it must be applied only when the surface and environmental conditions meet product requirements.
Ask for written aftercare instructions, including when the surface can be walked or driven on, how to clean it and when resealing may be considered. Avoid applying a sealer based on a fixed calendar alone if the product instructions or site conditions require otherwise.
8. Inspect the completed work
Before final acceptance, inspect the surface, borders, drainage, edges, joints and general pattern consistency. Discuss any concerns with the contractor promptly. Ask what maintenance is recommended and retain the product information and quotation for future reference.
A responsible contractor should explain normal characteristics of concrete, including the possibility of cracking or colour variation, rather than promising that no issue can ever occur.
Common mistakes to avoid
Frequent problems include inadequate ground preparation, poor drainage, an unsuitable concrete specification, insufficient planning for the pour, misaligned stamps, incorrect material application, rushed curing and using an incompatible sealer. Replacing specified materials with untested alternatives can also affect the result.
The cheapest quotation may omit essential work. Compare the complete method and scope, not just the price per square metre. Ask which tasks are included and who is responsible for materials, labour, equipment and site preparation.
Frequently asked questions
How long does stamped concrete installation take? The timeline depends on area size, preparation, access, weather and curing requirements. Obtain a schedule for your site.
Can stamped concrete be installed over an existing surface? It depends on the condition and suitability of the existing surface and the proposed system. A site inspection is needed before deciding.
When can vehicles use the floor? Follow the contractor’s and concrete supplier’s instructions for the actual mix, conditions and loading. Do not assume the surface is ready simply because it feels hard.
Does sealing prevent all stains and cracks? No. A compatible sealer can help protect the surface, but it does not eliminate every maintenance issue or prevent all cracking.
Where can I get installation advice in Nigeria? Contact Tpave Increte Ventures and provide the site location, intended use, approximate area and preferred design.
Conclusion
Stamped concrete installation is a coordinated construction process, not simply pressing a pattern into wet cement. Site preparation, drainage, slab design, material timing, stamping and aftercare all contribute to the outcome.
If you are planning a stamped concrete project, contact Tpave Increte Ventures to discuss the work or the materials required. Share the site location, approximate dimensions and intended use so the next step can be based on your project.
Suggested internal links
Tpave installation guide: https://tpaveincreteventures.com/installing-stamped-concrete/
Stamped concrete floor in Nigeria: https://tpaveincreteventures.com/stamped-concrete-floor-in-nigeria/
Stamped concrete materials: https://tpaveincreteventures.com/increte-stamped-concrete-floor-materials-in-nigeria/
Contact / website: https://tpaveincreteventures.com/


